Applying methods of welding steel structures is extremely common in constructing steel structures. Let’s explore the definition of structural steel welding, the common welding methods, and the standards of structural steel welding with Pebsteel in this article below.
See more: What is Structural Steel? Types of Structural Steel and Shapes
1. What is structural steel welding?
Welding uses heat or an electric arc to melt a small portion of the metal at the contact point, causing the metal to fuse. After cooling, the metal solidifies, forming a weld.
Structural steel welding is a technical process used in the construction and metal manufacturing industries to join steel structural components. The process of welding steel structures is a crucial part of building large industrial facilities such as high-rise buildings, bridges, factories, and other infrastructure projects.
See more: Advantages Of Steel Structure
2. Some popular structural steel welding methods
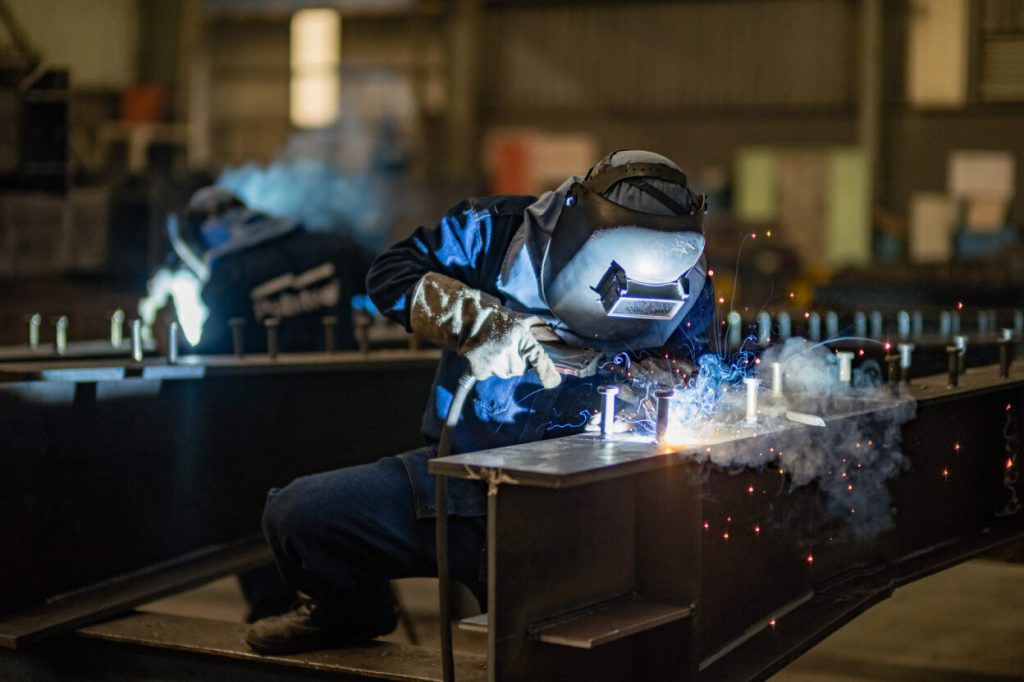
2.1. Manual arc welding
Manual arc welding in steel structures uses an electric current for operation. An electric arc flame appears between the two metal ends to be welded and the welding rod. The high temperature of the electric arc flame (which can reach over 2000 degrees Celsius) melts the edges of the base steel (melting depth ranging from 1.5 to 2 mm) and the welding rod. The metal in the welding rod melts into droplets and falls into the welding groove due to the pulling force of the electric field. Two molten metal parts blend together and, once cooled, form a weld bead. The essence of a weld bead is the connection between the molecules of the melted metals. A weld has the ability to withstand forces equivalent to those of basic steel.
See more: Erection of Steel Structures
2.2. Automatic and semi-automatic arc welding
It provides high productivity and ensures the weld’s mechanical integrity. Automatic and semi-automatic arc welding methods in steel structures can also save electrical energy and provide good working conditions for laborers.
In theory, automatic welding is similar to manual welding, except the coated welding rod is replaced with an uncoated wire reel, and an automated machine carries out the welding process. The welding flux is evenly distributed in advance into the welding groove..The electrode wire is automatically fed at a steady rate matching the speed of the welding machine.
Automatic welding has many significant advantages. With a high current intensity ranging from 600 to 1200 amperes, the welding speed is much faster than manual welding, sometimes up to 5 to 10 times. The deep melting groove provides conditions for a high-quality weld. The molten metal is coated with a thick layer of flux, allowing it to cool gradually, creating conditions for gas bubbles to escape and making the weld stronger. The welding arc burns beneath the flux layer, posing no harm to the health of the welder.
Currently, there is a semi-automatic welding method using a flexible welding wire, which comes in either tube or flat form, with a metal shell thickness ranging from 0.2 to 0.5 mm. Inside the wire tube, there is welding flux. This method is widely used due to its convenience.
See more: QUOTATION OF WAREHOUSE CONSTRUCTION COSTS UPDATED IN 2023
3. Structural steel welding standards
After completion, the weld of the steel structure must pass the following six standard inspections:
3.1. External Inspection:
- The weld must be free from cracks on the surface and molten metal.
- No porosity, undercuts, burn-through, lack of fusion, or other technological defects are allowed.
- There should be no angular breaks or misaligned edges.
- Deviations in size and shape of the weld and protrusions that compromise strength are not acceptable.
Read more: Bolt Connections In Steel Structure
3.2. Visual Inspection:
- There should be no signs of cracks in the molten metal or the heat-affected zones of the base metal.
- No lack of fusion between the layers of the weld and the bevel edge is allowed.
- There should not be weld omissions at the root of the weld exceeding 15% of the thickness of the member or more than 3 mm if the section is over 20 mm thick for single-sided welding.
- The presence of porosity is not allowed, and the number of pores should not exceed 5 per 1cm². The size of each defect should not exceed 1.5 mm, and the total should not exceed 3 mm.
- Cracks or fractures in the structural part are not allowed, as they can reduce the metal’s elasticity and flexibility.
3.3. Hydraulic Inspection:
- The weld should show no signs of cracks.
- There should be no signs of water leakage.
- No significant deformations should be detected.
3.4. Weld Test Results Inspection:
- This value, calculated as the average of results from test samples, should not be at least the minimum strength of the corresponding steel. Additionally, every sample should be at most 10% of the minimum strength.
3.5. Bend Test Inspection:
The weld quality test results must not fall below the following thresholds:
- The minimum allowable bend angle for carbon steel with a sample thickness ≤ 20 mm is 100 degrees. For sample thickness > 20 mm, the minimum allowable bend angle remains at 100 degrees. The minimum permissible bend angle for samples with a thickness ≤ 12 mm is 70 degrees.
- For low manganese and silicon-manganese alloy steel with a sample thickness ≤ 20 mm, the minimum allowable bend angle is 80 degrees. The minimum permissible bend angle for sample thickness > 20 mm is 60 degrees. For samples with a thickness ≤ 12mm, the minimum allowable bend angle is 50 degrees.
- For low chrome-molybdenum and chrome-molybdenum-vanadium alloy steel with a sample thickness ≤ 20 mm, the minimum allowable bend angle is 50 degrees. The minimum allowable bend angle for sample thickness > 20 mm is 40 degrees. The minimum allowable bend angle for samples with a thickness ≤ 12 mm is 30 degrees.
- For high-chrome alloy steel with a sample thickness ≤ 20 mm, the minimum allowable bend angle is 50 degrees. The minimum allowable bend angle for sample thickness > 20 mm is 40 degrees. The minimum allowable bend angle for samples with a thickness ≤ 12 mm is 30 degrees.
- For high-chrome-molybdenum alloy steel with a sample thickness ≤ 20 mm, the minimum allowable bend angle is 100 degrees. For sample thickness > 20 mm, the minimum allowable bend angle remains 100 degrees. The minimum allowable bend angle for samples with a thickness ≤ 12 mm is 30 degrees.
3.6. Impact Toughness Testing:
- At an ambient temperature of 20 degrees Celsius, the minimum impact toughness value for all types of steel, except austenitic steel, is 49.05 Nm/cm2, while for austenitic steel, it is 68.67 Nm/cm2.
- At a temperature lower than 0 degrees Celsius, the minimum impact toughness value for all types of steel, except austenitic steel, is 19.62 Nm/cm2, and for austenitic steel, it is 29.43 Nm/cm2.
Read more: What is Synthetic Steel? Features and Classifications
4. Conclusion
Above are the details about the definition and some structural steel welding methods. If customers seek comprehensive solutions for Prefabricated Steel Buildings and Steel Structures, please contact Pebsteel via email at Marketing@pebsteel.com.vn or phone at +84 908 883531 for immediate consultation.

